In Canada, dim headlights are one of the causes of road accidents. When you have a clear headlight, not only does it make driving easy and safe, it also allows other motorists to see you. So having a foggy headlight is the last thing you want.
Most light coverings are made with polycarbonate plastic. The plastic is excellent for harsh weather and terrible road conditions. However, over time the UV rays of the sun destroy the plastic by causing it to oxidize.
Therefore, no matter how much you maintain your headlights, they’ll surely cloud over and degrade. But that doesn’t mean you need to replace them constantly. You can save money by learning how to restore your car headlights DIY.
You may have come across the toothpaste hack for cleaning a foggy headlight. Although toothpaste may clean your foggy car headlights to an extent, it’ll take more than that to restore them to their former look. So if your headlights are turning yellowish and cloudy, here are ways to make them gleam again.
Tools For Cleaning Foggy Headlights
To restore your car headlights, you can purchase the restoration kit online, including all the essential materials or hire a professional cleaning service.
But if you’re a DIY enthusiast, it’s ideal you buy your tools at your local automotive shop. Based on research, we’ll highlight the products you can use for cleaning your headlights.
Depending on whether you’re using sandpaper or toothpaste, here are the tools you’ll need for your car headlights restoration. With these simple materials, you can make your headlights look brand new.
Grit sandpaper:
- 350 – 850 grit sandpaper (very dry sand)
- 1000 – 2000 grit sandpaper (damp sand)
- 2100 – 3500 grit sandpaper (wet sand)
- Water
- Isopropyl Alcohol
- Painter tape
- Soft Cloth or microfiber towels
- Paste wax
- UV protectant or Headlight shine coat
- Dish sponge or Padded sanding foam
- Orbital sander
- Levelling compound or Headlight polish
Toothpaste:
- Water
- Toothpaste
- Baking soda (if necessary)
- Wax
- Cloth
- WD-40 spray
- Plastic sheeting
- Painter’s Tape
- Vinegar
- Toothbrush
Before you proceed, ensure the toothpaste is a real abrasive paste and not gel. Gel paste will make your headlights opaque and only leave a minty smell.
However, if you don’t have a real paste, we advise you to mix the gel with baking soda to get a gritty texture. If you’ve done this, grab your other tools and let’s get started.
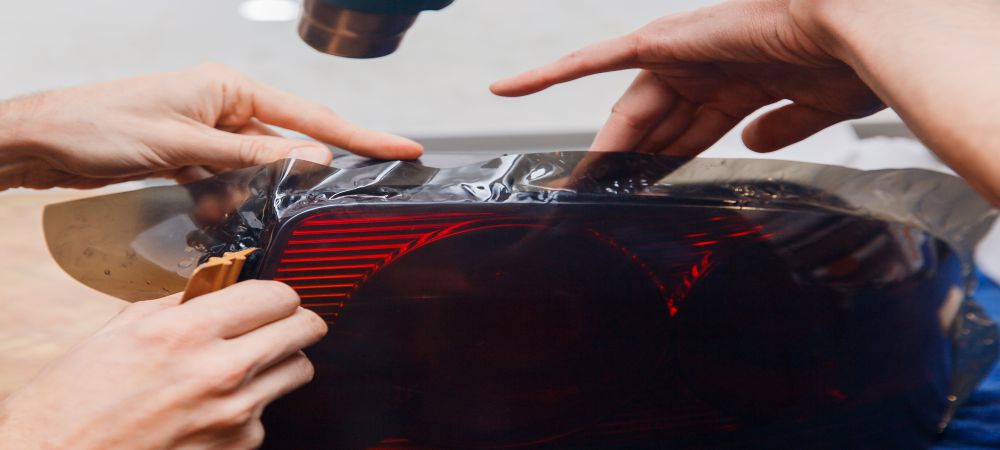
Related Article: Pros and Cons of Headlight Tinting
How To Restore Your Car Headlights From Foggy To Clear
There are several ways to clean a foggy headlight. You can use vinegar, spray, toothpaste etc. Thankfully, all these processes are easy, time-saving and cheap to perform.
Some people try out these cleaning methods separately. But for best results, you’ll probably need to combine them, which may be quite tasky.
In truth, the more complicated processes work better than the easy and fast methods. That said, here are the ways on how to restore your car headlights.
How to clean foggy headlights with grit sandpaper
If your headlights are terribly cloudy and you can’t drive with them, use 350 – 850 grit sandpaper (very dry sand)
Step 1: Clean headlights
The first thing to do is wash your headlight lenses thoroughly with water and soap. Also, clean the surrounding area of the headlights so that the painter’s tape will fasten in the following step.
Step 2: Tape around the headlights
Next, tape the headlights surrounding to prevent your car paint from peeling during the cleaning process. When you start sanding, and your hand slips off, you’ll be delighted you protected your car. If you don’t have painter’s tape, use masking tape.
Step 3: Sand! Sand! Sand!
Sanding is the most important part of the cleaning process. Whether you’re working with a kit or individual materials, the procedure remains the same.
Wet the headlights and the sandpaper, then sand in horizontal straight strokes. Sand the headlights in the right to left motion or vice versa.
Ensure the surface is wet as you clean, or else you’ll scratch the light due to built-up grit. If your headlights are in a bad state, you must use a lower grit number (less grit number means more abrasive).
Cleaning with a low grit number (350 grit) is the easiest way to restore your car headlights. While cleaning, keep your pressure fluid and even.
At this moment, your headlights will appear even foggier. The outcome depends on how much you sand at this point. So, don’t be in haste to sand. Spend at least 5 to 15 minutes on it.
Step 4: Rinse and repeat
Rise your head headlight with clean water and wipe with a soft cloth. Then, repeat the procedure with less grit sandpaper. The difference between the two sanding processes is in the direction of your motion.
During this stage, you’ll sand diagonally rather than horizontally. The reason you’re switching directions is that you’re sanding away the ridges you’ve made earlier. Take your time to restore your car headlights and ensure it remains wet. Using a spray bottle or hose works excellently here.
Step 5: Rinse and finally repeat
Rinse the headlights again to wipe off any plastic debris. The last sanding step requires that you use the best grit with water. Then sand in the right to left motion again. Finally, rinse with clean water and wipe with a soft towel.
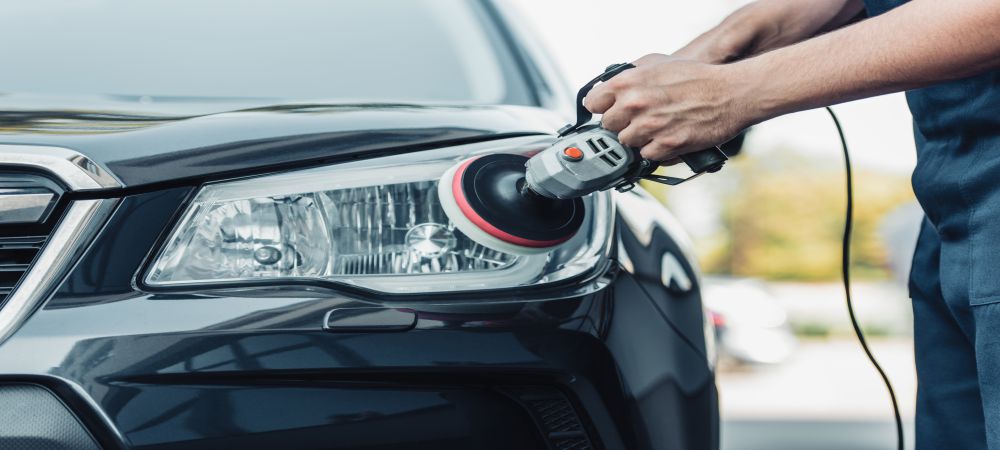
Step 6: Polish, Buff and wax with a microfiber pad or wool
Now is the moment to uncover the results of your sanding. Dry the headlights and dab the microfiber pad or wool into the polishing compound.
Ensure the mixture is evenly saturated into the wool. Then apply it onto your headlights in a circular motion.
To hasten the process, use an orbital sander or buffer. After the lenses are clear, add wax to them. Wax the lens the same way you’ll wax a car. The waxing process protects and cleans the lens for the remaining steps.
Step 7: Clean using isopropyl alcohol
Clean your headlights with Isopropyl alcohol for extra shine. At this point, you may begin to see the reflection of light on the lens.
Step 8: Apply headlight lens clear coat
You need to add a new coat because you’ve removed the old ones during the sanding step. If you bypass this stage, all your efforts to restore your car headlights will go to waste because the paint sealant acts as a protective film that prevents your headlights from getting foggy.
Spray the lens clear coat or UV protectant following the instructions on the bottle. Generally, the rule is to apply a coating of sealant, except the instructions say otherwise.
Your clear coat may either come as a liquid to wipe on it or spray. Full coverage is essential here. Park your car in an airy place to allow your sealant to cure.
Step 9: Try it out
If, after following all the steps on how to clean your car headlights and you don’t see any improvement, we advise you to go over the process again — this time, with more sanding. Sadly, some lenses are past restoration that you may need to replace them entirely.
How to clean your headlights with toothpaste
Toothpaste is an excellent headlight restoration material because it has small abrasive substances that can penetrate grimes.
Not to mention, the formula is effective for on-road particulates and the outcomes of oxidation. Here is a guide on how to use toothpaste for car headlight restoration.
Step 1: Prepare the headlights
Tape the edges of your vehicle headlights to retain the paint job. If you don’t want to use excess tape, you can work with plastic sheets since sticky adhesives are likely to spoil the car colour if left for long.
Step 2: Make the paste
If your toothpaste isn’t gritty enough, mix it with baking soda. When the paste is smooth, spread it thoroughly on the lens using your hand.
Step 3: Rub into the creases
With a wet toothbrush, work the toothpaste into the edges and sides of the headlights.
Step 4: Scrub! Scrub! Scrub!
Scrub the headlights with even pressure. Applying too much pressure may leave scratches on your lens. Scrub for about 5 minutes for best results.
Step 5: Rinse
Spray your headlight with clean water, preferably hot water. Then with a soft paper or cloth, wipe off the toothpaste and dry the lens. Repeat the process from step 2 till the grits on your light are clear.
Step 6: Wax and polish
Apply wax on your headlights to prevent the plastic from getting yellowish or foggy.
Step 7: Finish off
Finally, use a clean cloth, then wipe the wax. Leave it to dry before removing the protective tape.
The coating of wax you apply may seem trivial, but it’s important. The wax acts as a protective barrier that not only helps you restore your car headlights but also keeps them clear for long.
Keep in mind a very foggy light will require that you scrub more pastes into it. Depending on how unclear it is, you may need to apply multiple coats of paste to give it shine.
The best tool to use when working with toothpaste is a Dremel. It’s a small power tool that comes with a mechanical spinning brush, so you won’t have to exert much pressure while using it.
While using the Dremel, ensure you put it on the lowest setting to avoid melting your headlight lens. However, if you can’t afford the Dremel, good old elbow grease will work.
How to wipe your headlights using spray
Your car headlights restoration doesn’t need much pressure. If you can’t wash, scrub or wipe your lights, there’s a better option you can try.
Using a spray offers you a quick solution. However, unlike other cleaning methods, the results are not long-lasting.
Step 1: Prep your vehicle
Prep your vehicle for defogging by taping the area and washing off any debris or dirt on the headlights. Mix a warm soap solution to ready the lens.
Step 2: Apply the spray
Shake the spray can and apply it to the lens. Ensure you hit the hidden spots. Then, carefully wipe off the oil with a soft towel. Since the spray is oily, it’s ideal you clean it thoroughly so the following processes can stick.
Step 3: Polish
Although the lubricant may seem like polish, you should use a UV sealant to finish the look. Not to mention, the sealant will act as an extra cost over the lens.
Whenever you use the spray to restore your car headlights, apply sparingly. The constant use of lubricant can burn out or blur your headlights. So ensure you wash it off completely after every use. The spray cleaning method is an excellent cleaning method if you’re in a rush.
How to restore your headlights with vinegar
Looking for how to clean your car headlights easily? Try the vinegar solution. Vinegar is undoubtedly an excellent cleaning mixture.
But when you use it alongside baking soda, it creates a chemical reaction that’s strong enough to clean headlights oxidation and tough stains.
Step 1: Preparation
To clean foggy car headlights, tape around the car edges so the paint stays intact.
Step 2: Mix the solution
Wash the light with water and soap. Ideally, you should use dish soap. Wipe the headlights and rinse. Then, mix the vinegar with a baking soda; you should notice them react immediately.
Step 3: Apply! Apply! Apply!
With a small bowl, scoop the baking soda and vinegar mixture onto the lens. Wipe at the headlights effortlessly in a single motion until it’s clean again. You may need to apply elbow grease for it to shine.
Step 4: Dry off
Once you rinse off the solution, dry it off and polish.
The Importance of Clean Headlights
Clean headlights are super important. Low visibility due to dirty car headlights is the cause of fatal crashes, accidents and pedestrian deaths every year.
Keeping your headlights clean is of paramount significance for you to stay safe while on the go. If you notice that your light visibility is diminishing, it’ll help to restore it immediately.
Related Article: Cost of Car Headlight Restoration in Toronto
Conclusion
What determines whether you can restore your car headlights or not is if the defect is outside or inside the lens. Examine your headlights using your hands. If it’s smooth, the fogginess may result from moisture, and you’ll have to replace the entire lamp assembly. But if the exterior is bumpy and rough, then the cleaning guide is your solution.
Fortunately, most unclear lights have their damages outside, so you quickly restore them. When restoring your headlights DIY, you must exercise caution. If you’re unfamiliar with these cleaning methods, it’s ideal you save yourself the stress by hiring a professional.
Our professional car headlight restoration services can help you give your vehicle a new look. Here at Autoboss Vaughan, we’ll revitalize your plastic from cloudy without weakening or damaging the other parts of your car paint and panel.
Our restoration procedures include buffing, fine polishing and graded sanding. Contact us today to have your lens professionally restored today!