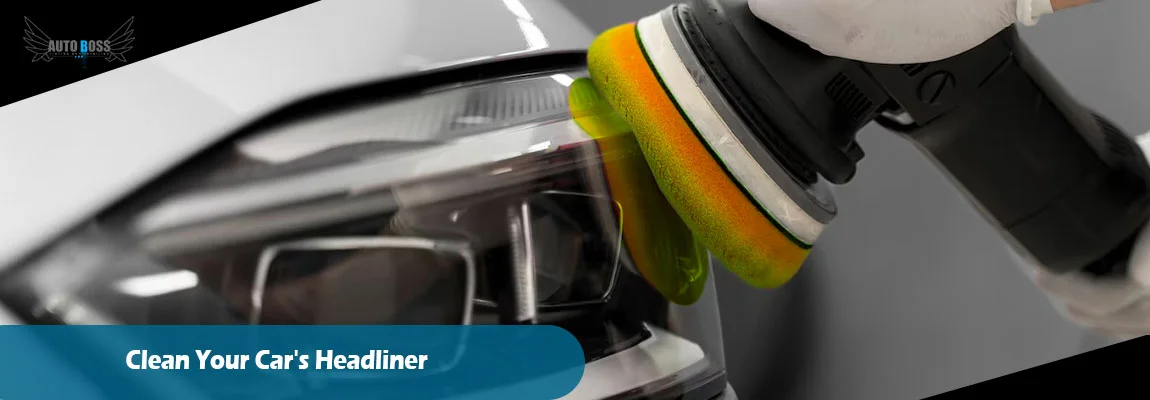
When it comes to maintaining the appearance and functionality of your vehicle, thorough interior detailing is essential. One often overlooks cleaning car headliners, vital to full interior detailing. The headliner is also known as the roof liner. It is the fabric material that lines the car’s interior roof. It can accumulate dust, dirt, and even stains from spills over time. Cleaning and maintaining the car’s headliner is significant in restoring its pristine condition.
Here, I will guide you about cleaning your car’s headliner:
Why Clean the Headliner?
A clean headliner enhances the overall aesthetics of your car’s interior. It also contributes to a comfortable driving experience. Dust and dirt buildup on the headliner gradually spoil air quality within the car’s cabin. Stains and grime can also make your car’s interior look clean and addressed. Cleaning the headliner is a simple yet effective way to maintain the vehicle’s value. It ensures a pleasant driving environment.
Tools and Materials You’ll Need
Gather the tools and materials you’ll require before you begin the cleaning process. Proper materials and tools are helpful to ensure a successful operation:
Microfiber Cloths
These clothes or towels are gentle on the headliner’s fabric. They are excellent for removing dust and loose dirt.
Soft-Bristle Brush
Choose a brush with soft bristles to agitate and loosen stubborn dirt particles gently.
Mild Upholstery Cleaner
Choose an upholstery cleaner that’s safe for fabric. I will not leave behind residues or damage the material.
Water
You’ll need water to dilute the upholstery cleaner and rinse.
Isopropyl Alcohol
This is effective for removing tough stains and sticky residues.
Spray Bottle
It is necessary to create a diluted cleaning solution.
Vacuum Cleaner
The vacuum is prepared with a soft brush attachment. It will help remove loose dirt and dust before cleaning.
Lint Roller
Useful for picking up smaller particles from the headliner.
After gathering tools and materials, you can move on to the step-by-step cleaning process.
Step-by-Step Cleaning Guide
Here, I will discuss every step of the headliner’s cleaning process:
Step 1: Prepare the Area
Park your car in a shaded area or a garage. It prevents direct sunlight from drying the cleaning solution too quickly. During the cleaning process, open all the doors and windows. It ensures proper ventilation.
Step 2: Vacuum the Headliner
Use a soft brushed vacuum cleaner. It will remove loose dirt and dust from the headliner’s surface. Vacuuming prevents abrasive particles from scratching the fabric.
Step 3: Test the Cleaner
Test the cleaner on a small area before applying it to the headliner. Checking the cleaner on small areas ensures it doesn’t cause discoloration or damage. Following the instructions on the cleaner’s label gives you the best results.
Step 4: Dilute the Upholstery Cleaner
Mix the upholstery cleaner with water according to the manufacturer’s instructions. Fill the solution into a spray bottle for easy application.
Step 5: Apply the Cleaning Solution
Spray a small amount of the diluted upholstery cleaner onto a microfiber cloth. It’s crucial to use a gentle touch to avoid saturating the headliner. Gently small amounts or blot the stained areas—avoid rubbing, as it might damage the fabric.
Step 6: Agitate Stubborn Stains
Damp a soft-bristle brush with the diluted cleaning solution for tougher stains. Brush the stained area gently using light and circular motions. Remember, gentle agitation helps avoid damage.
Step 7: Remove Residues
After cleaning, use a clean microfiber cloth dampened with water. It removes the remaining cleaning solution from the headliner. Mark the area to lift away any residues.
Step 8: Address Sticky Residues
If you encounter sticky residues or persistent stains, dip a cloth in isopropyl alcohol. Gentle wipe the affected area. Again, test the alcohol on a small area first to ensure it doesn’t cause any damage.
Step 9: Dry the Headliner
Let the air dry the headliner by keeping the doors and windows open. Avoid direct heat sources like hairdryers. Direct heat sources can damage the fabric. Before closing windows and doors, ensure the headliner is completely dry.
Step 10: Final Touches
Once the car’s headliner is dry, please give it a final once-over with a lint roller to pick up any remaining particles. You can also use the vacuum cleaner’s soft brush attachment again to ensure no loose debris is left behind.
Conclusion
A clean and well-maintained headliner can significantly elevate the interior of your car. Following these steps and using the right tools and materials can remove dirt, stains, and grime from your car’s headliner. Remember, gentleness is the key to a successful cleaning process—avoid excessive rubbing or scrubbing to prevent damaging the delicate fabric. Regular headliner cleaning is a part of a comprehensive interior detailing routine. It will keep your car looking great and provide a more comfortable and enjoyable driving experience. However, abrasive and harsh pressure wash can break or cause cracks in your car.
Auto Boss Vaughan detailers provide you with full detailing services. Contact us with confidence that we will take good care of your car and clean it without damage.
FAQs
Which solution is used to clean?
White vinegar is the cleaning solution that helps remove stubborn grease stains on the car’s headliner—mixing the vinegar with water in a 3/1 percentage. Pure vinegar damages the surface.
How does a car headliner get dirty?
Car headliners consist of a soft foam-like interior. It is covered with suede, vinyl, fabric or leather.
Why does the headliner get dirty?
The headliners become discolored and stained over time. Dirt, smoke, or leaky roof causes it to get stained.
Which is the best headliner cleaner?
Fabric upholstery cleaners for the headliners can be effective. Some of the top recommendations include:
- Glart Interior Cleaner
- Meguiar’s Carpet and Interior Cleaner.
Why does the car interior become dusty?
Dust accumulates in the car interior because of turboelectric static electricity. It is electricity that is encountered every day. Electrons get exchanged between the object and plastic to become the reason for dust accumulation.