I see, so you spent the extra cost on those plush leather seats, but now they have cracked and a kid’s meal all over them. And now you’re wondering, how are you going to clean that without causing damage to the seats? Or, what else can I use for cleaning up this mess? While we don’t have any magic to help you clean your seats, we can tell you the steps and tips to clean your seats up as new.
What You Need
Using the right equipment and materials helps maintain your leather seats and keeps them looking new and plush for years. And the best part is you can save money on premium equipment and top-of-the-line materials. Many of these items are found at local auto retail shops or favorite online retailers. Here, I will guide you about some tools and products to help clean your car’s leather seats:
- Vacuum cleaner
- Microfiber cloth
- Leather cleaner
- Leather conditioner
- Soft-bristled brush
- Damp towels
Step by Step: Cleaning Leather Car Seats
It is difficult to clean your car’s leather seats, especially if it’s your first cleaning attempt. You can take a few steps to prepare your seats for a worthy treatment.
1. Remove Obstacles and Large Debris
If you have a child or animal like a pet, you mostly have large equipment like a car or booster seat installed. Removing these items, trash, or other large obstacles can help you easily clean your leather seats. It can also help you see and tackle any dirt or grime your pets might have left behind from their afternoon snack. It also lets you clean these items before installing them in your car again. Doing this helps you maintain your leather seats’ clean look and feel for longer.
2. Vacuum the Seats
Vacuuming your seats and nearby areas can help you pick up the pesky crumbs and sprinkles of dirt. If you have a brush for your vacuum, you can use it to clean your seats without scratching or damaging them. Make sure you get between all the little cracks and crevices. Clean up the maximum possible dirt. If there is still dirt and dust crammed in the seat’s different crevices, to get them out, use a cloth.
3. Test Your Cleaning Solution
Testing it on a tiny hidden part of your seat before you apply your leather cleaning solution to your car’s seats will be a great idea. It is important if this is your first time using a new cleaning solution because it can prevent you from mistakenly ruining or staining your car’s leather seats. Some reactions, including fizzing or melting, indicate that you must stop using that cleaner.
When choosing a new cleaning solution, review your manufacturer’s manual. There might be specific cleaner considerations from your vehicle’s manufacturer. If you’re cleaning MB-Tex material, it is very important to consider a gentle cleaning solution rather than a harsh leather cleaner to prevent damage or stains to your leather seating.
4. Clean Off Additional Grime
The vacuum is excellent for picking up loose debris, but some grime may still be left behind. In this case, you can use a microfiber towel sprayed with the cleaner to eliminate this grime. It is good for any sticky left behind from your kids’ spilled juice or some melted gummy snacks, and you get deep-rooted satisfaction whenever you get rid of sticky spots. Once you’re done cleaning the surface dirt and grime layer, you’re ready to start deep cleaning your car’s leather seats.
5. Apply a Cleaning Solution
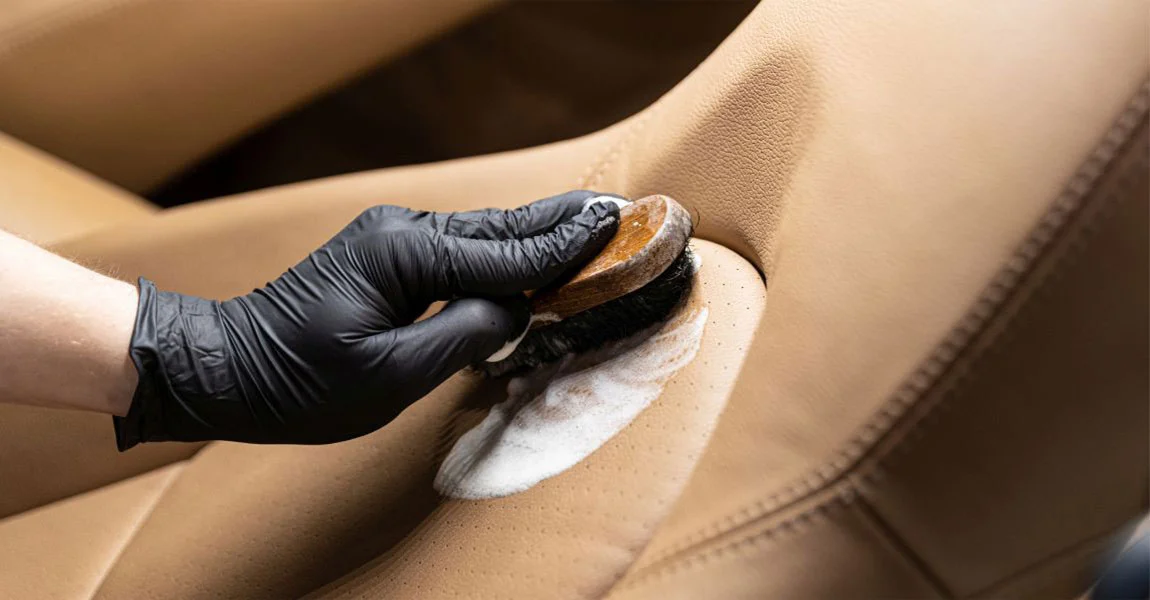
Once you’ve tested a spot on your car’s seats, apply the cleaning solution to the rest of your leather seats. Apply this cleaning solution to the leather using a soft-bristled brush. It can help you break down tough stains, dirt, and creases. Ensure applying enough to clean the seat versus saturating the material. Working in small sections simultaneously to prevent discoloration or stains from the cleaning solution is also a great idea.
If your vehicle’s seats have holes, scratches, tears, or other damages, apply the cleaning solution cautiously. Apply the cleaner to a microfiber towel instead of directly to the seat material to prevent additional damage to your car’s leather seats. When working the solution to leather, apply a little pressure to clean the outer surface. Move the bristled brush in circular motions to remove tough stains and dirt without giving more damage.
6. Wipe the Seat by using a Damp Towel
Now that the leather seats are clean, you can wipe the cleaning solution from the seats. Use a towel dampened in water to wipe the excess cleaning solution from the seats. Using a damp towel will help you pick up dirt or grime you may have missed during cleaning at first, which prevents the debris from damaging your car’s floor. Consider looking into floor mats if you’re considering your vehicle’s floor. Cleaning up becomes easy when crumbs end up on your floor from your seats.
7. Dry Seats With a Microfiber Towel
After completing your wipe-down, you can use a dry microfiber towel. It will remove excessive moisture from the seat’s surface, which can help prevent mold from building up. Ensure wiping the seats until they are thoroughly dry to help prevent them from wrinkling or cracking.
Conclusion
Cleaning your car’s interior is as important as taking care of its exterior. If you don’t care about your car’s interior, you may leave it smelly. It makes your journey unpleasant. Talking about interior detailing, you need to clean every nook and corner of it. If you leave a minor grime in your car, it can become the reason for mold creation. However, full interior detailing requires patience and time. You can do it yourself, but you may need another hand, as it can be a lot of detailed work. You can overlook some of the corners that may create a smell again. Or you can leave the leather or other upholstery wet and close the doors. It can also create damage to the leather. However, leaving the hard task to professionals like Auto Boss Vaughan can help you with comprehensive detailing. They have materials and tools suitable for the job and can serve you better.